本文我们将创建一个基础的 Vue.js,从而学会构建 Todo App 以有助于践学 Vue JS 。
学习框架的有效方式就是践行。
设置
我们从简单的 html 和 css 开始,并且不涉及 JavaScript ,将学习如何使用 Vue JS 添加 JavaScript 功能。
mkdir vue-beginner-todo && cd vue-beginner-todo

yarn init -y

yarn add vue
yarn add vue-router
yarn add todomvc-app-css

yarn add live-server --dev
|
我们安装了 Vue 和 Vue-router 依赖。我们为项目提供了良好的 CSS 库并添加 live-serve 以使得当代码改变提供来服务和重载页面。这就是我们本文案例所需要的库了。
package.json
{
  "name": "vue-beginner-todo",
  "version": "1.0.0",
  "main": "index.html",
  "scripts": {
    "serve": "npx live-server --entry-file=index.html",
    "start": "npm run serve"
  },
  "license": "MIT",
  "dependencies": {
    "todomvc-app-css": "^2.1.2",
    "vue": "^2.5.17",
    "vue-router": "^3.0.1"
  },
  "devDependencies": {
    "live-server": "^1.2.0"
  }
}
|
index.html
编写 index.html 文件,主要包括:
<!DOCTYPE html>
<html lang="en">

<head>
    <meta charset="UTF-8">
    <meta name="viewport" content="width=device-width, initial-scale=1.0">
    <meta http-equiv="X-UA-Compatible" content="ie=edge">
    <title>Vue Beginner Todo App</title>
    <link rel="stylesheet" href="node_modules/todomvc-app-css/index.css">
</head>

<body>
    <div class="app">

    </div>


    <script src="node_modules/vue/dist/vue.min.js"></script>
    <script src="node_modules/vue-router/dist/vue-router.min.js"></script>
    <script src="app.js"></script>
</body>

</html>
|
运行命令,用浏览器打开页面试试:
$ yarn start
yarn run v1.9.4
$ npm run serve

> vue-beginner-todo@1.0.0 serve /home/qinjh/workspace/vuejs/vue-beginner-todo
> npx live-server --entry-file=index.html

Serving "/home/qinjh/workspace/vuejs/vue-beginner-todo" at http://127.0.0.1:8080
Ready for changes
|
Vue 起步
Vue Data & v-text
./app.js:
const todoApp = new Vue({
  el: "#app",
  data: {
    title: "Vue Todo App"
  }
});
|
./index.html:
<div id="app">
<h1>{{title}}</h1>
<input class="new-todo" placeholder="What needs to be done?" autofocus>
</div>
|
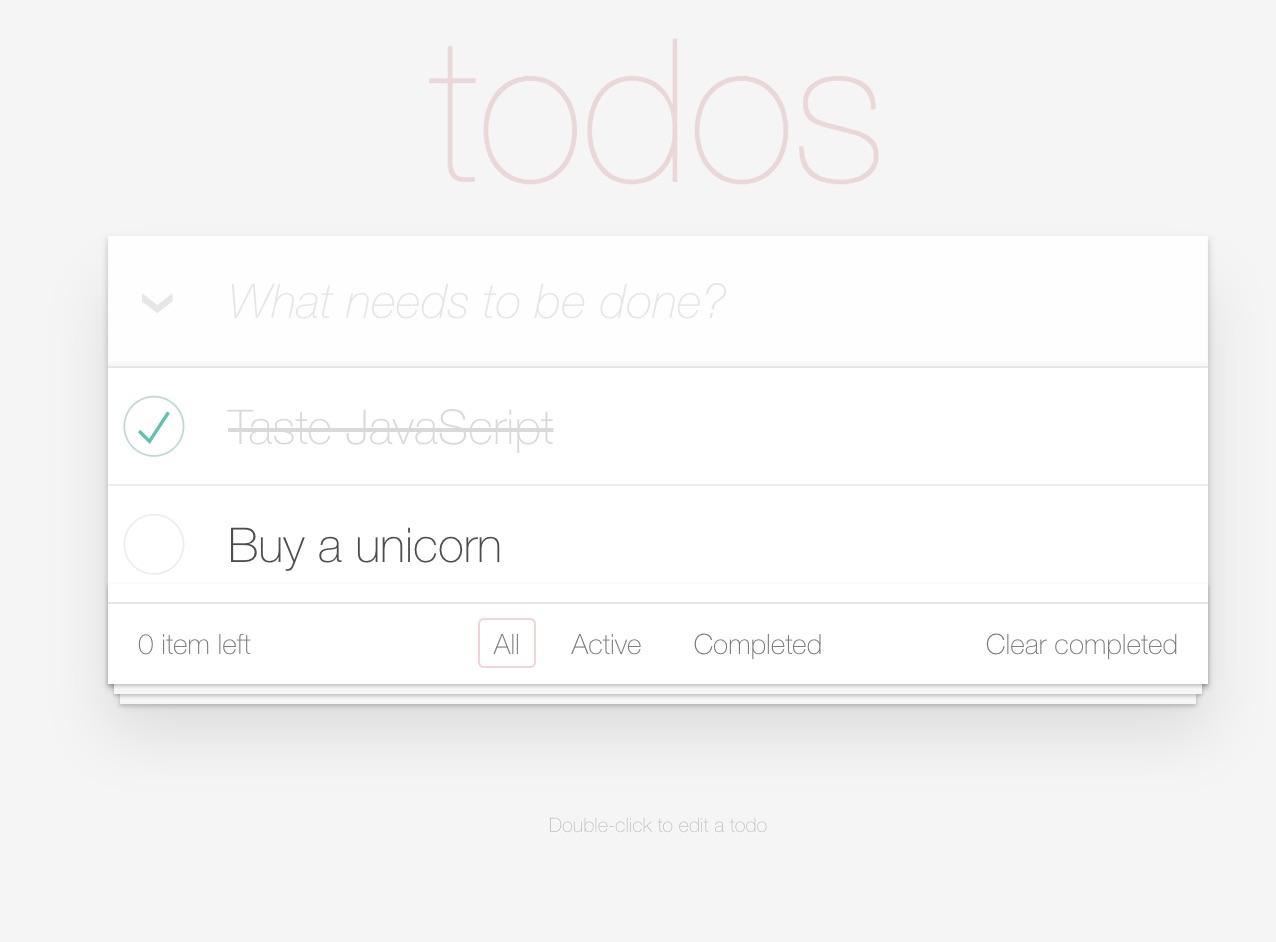
读取列表 v-for
添加更多有用的数据来丰富我们的 Todo 列表:
const todoApp = new Vue({
  el: '.todoapp',
  data: {
    title: 'Todos',
    todos: [
      { text: 'Learn JavaScript ES6+ goodies', isDone: true },
      { text: 'Learn Vue', isDone: false },
      { text: 'Build something awesome', isDone: false },
    ],
  }
});
|
index.html:
<body>
    <div id="app">
        <h1>{{title}}</h1>
        <input class="new-todo" placeholder="What needs to be done?" autofocus>
        <ul class="todo-list">
            <li v-for="todo,index in todos">
                <div class="view">
                    <input type="checkbox" class="toggle">
                    <label>{{todo.text}}</label>
                    <button class="destroy"></button>
                </div>
                <input value="Rule the web" class="edit">
            </li>
        </ul>
    </div>

    <script src="node_modules/vue/dist/vue.js"></script>
    <script src="node_modules/vue-router/dist/vue-router.min.js"></script>
    <script src="app.js"></script>
</body>
|
创建 Todo 以及 event 指令
在 Vue 中,我们可以使用 v-on:EVENT_NAME 来监听事件,例如:
v-on:clickv-on:dbclickv-on:keyupv-on:keyup.enter
通常,我们使用 @ 来简写,v-on:keyup.enter = @keyup.enter
下面,我们敲击回车来添加一条 Todo
<input class="new-todo"
    placeholder="What needs to be done?"
    autofocus @keyup.enter="createTodo">
|
data: {
},
methods: {
createTodo(event) {
const textbox = event.target
this.todos.push({ text: textbox.value, isDone: false });
textbox.value = "";
}
}
|
绑定样式 v-bind
<li v-for="todo,index in todos" :class="{completed:todo.isDone}">
</li>
|
使用 v-model 保持 DOM 与数据的同步
<input type="checkbox" class="toggle" v-model="todo.isDone" >
|
在浏览器的 console 输入如下指令就可以看到页面上的变化:
todoApp.todos[2].isDone = true
|
双击修改 Todo 列表
<label @dblclick="startEditing(todo)">{{todo.text}}</label>
|
const todoApp = new Vue({
el: "#app",
data: {
editing: ""
},
methods: {
startEditing(todo) {
this.editing = todo;
}
}
});
|
我们创建了一个新的变量 editing,当双击 Todo 文本时,我们将当前的 Todo 对象存放到该变量。
接下来,我们使用该变量:
<li v-for="todo,index in todos" :class="{completed:todo.isDone,editing:todo===editing}">
    <div class="view">
        <input type="checkbox" class="toggle" v-model="todo.isDone">
        <label @dblclick="startEditing(todo)">{{todo.text}}</label>
        <button class="destroy"></button>
    </div>
    <input class="edit" @keyup.esc="cancelEditing" @keyup.enter="finishEditing"
        @blur="cancelEditing" :value="todo.text">
</li>
|
finishEditing(event) {
  if (!this.editing) {
    return;
  }
  const textbox = event.target;
  this.editing.text = textbox.value;
  this.editing= null;
  textbox.value = "";
},
cancelEditing() {
  this.editing = null;
}
|
删除列表
<button class="destroy" @click="destroyTodo(todo)"></button>
|
destroyTodo(todo) {
  const index = this.todos.indexOf(todo);
  this.todos.splice(index, 1);
}
|
加入 trim()
计算属性 computed
<footer class="footer">
    <span class="todo-count">
        <strong>{{activeTodos.length}}</strong> item(s) left
    </span>
</footer>
|
computed: {
  activeTodos() {
    return this.todos.filter(t => !t.isDone);
  }
}
|
清除已完成的任务 v-show
<footer>
<button class="clear-completed" @click="clearCompleted" v-show="completedTodos.length">Clear completed</button>
</footer>
|
添加方法:
clearCompleted() {
  this.todos = this.activeTodos;
}
|
添加计算属性:
completedTodos() {
  return this.todos.filter(t => t.isDone);
}
|
v-show 与 v-if
v-show 和 v-if 看起来很相似,但确实不同的。v-if 从 DOM 移除元素并且事件不可见,v-show 是通过 CSS 样式 display: none 来隐藏。因此 v-if 比 v-show 消耗更高一些。
如果我们预先知道某些元素可以触发为不可见状态,通常使用 v-show,反之使用 v-if 。
如果没有 Todo 列表时,我们可以隐藏着两个部分:
<section class="main" v-if="todos.length">... </section>
<footer class="footer" v-if="todos.length">...</footer>
|
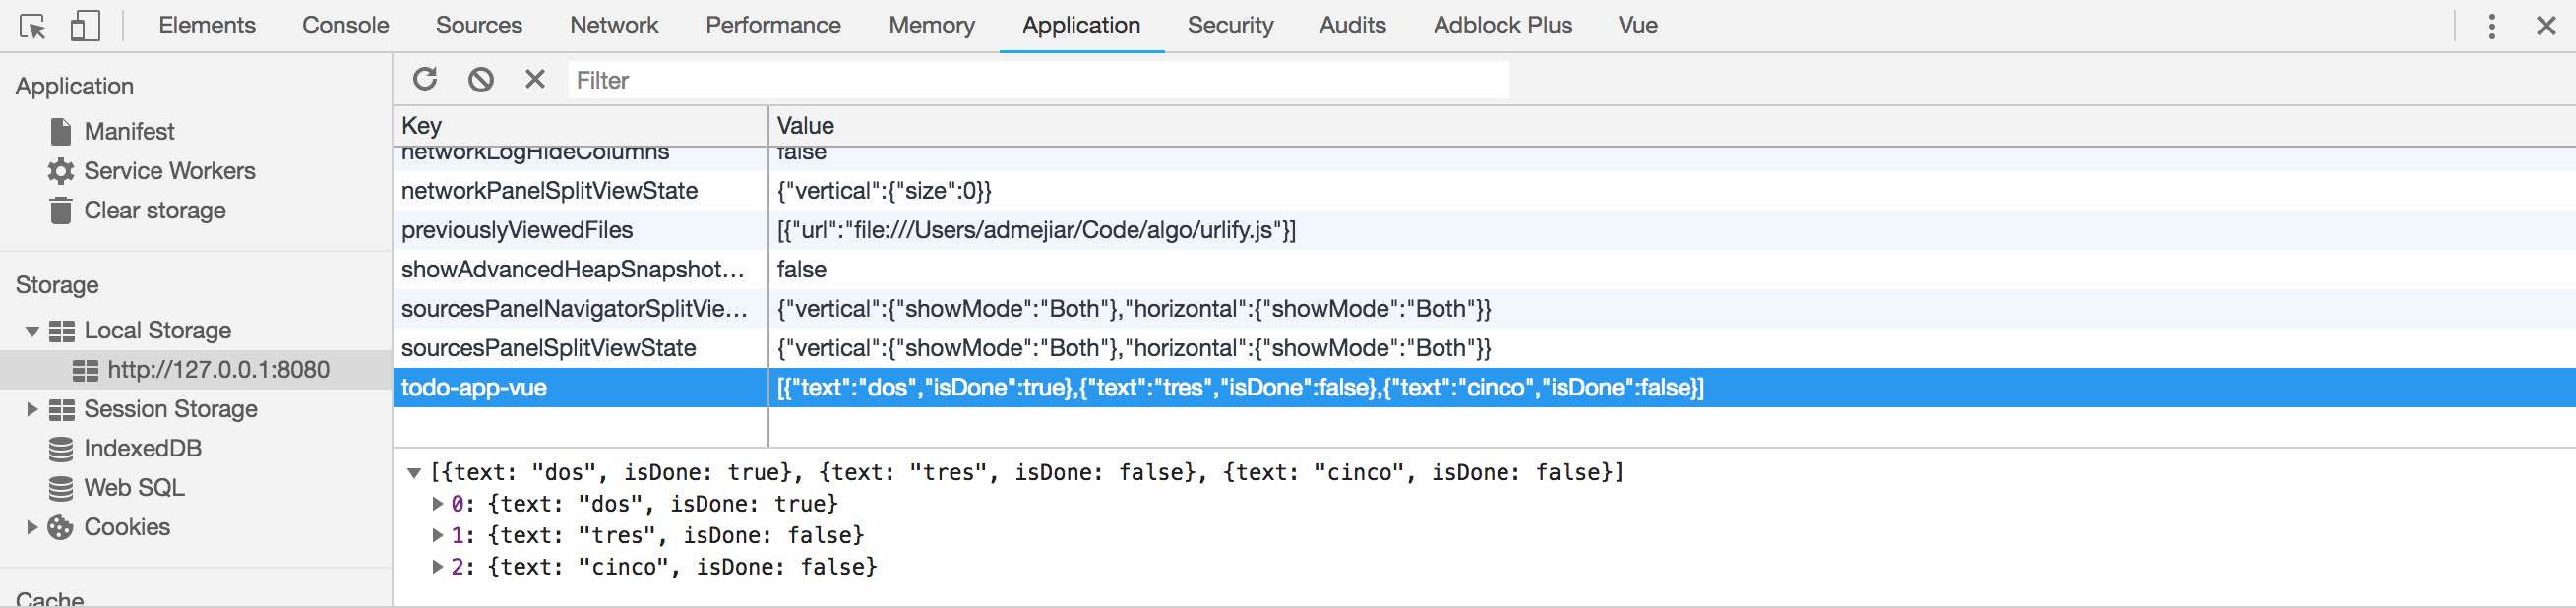
本地存储
当我们刷新时,列表又被重置了。在开发环境下这样是很有用的,但是并不是我们想要的。让我们来持久化 Todo 列表吧。
localStorage 的工作方式很简单,它是全局变量且只有 4 个方法:
localStorage.setItem(key, value):key/value 存储,key 和 value 被强制转换成字符串。localStorage.getItem(key):通过 key 获取项目。localStorage.removeItem(key):删除项目。localStorage.clear():从当前主机上清除所有项目。
首先,我们定义一个存储键:
app.js:
const LOCAL_STORAGE_KEY = 'todo-app-vue';
|
然后从本地存储替换 data.todos,如果存在的话:
data: {
  title: 'Todos',
  todos: JSON.parse(localStorage.getItem(LOCAL_STORAGE_KEY)) || [
    { text: 'Learn JavaScript ES6+ goodies', isDone: true },
    { text: 'Learn Vue', isDone: false },
    { text: 'Build something awesome', isDone: false },
  ],
  editing: null,
},
|
我们使用 JSON.parse ,因为需要将获取到的字符串转换成对象。
Vue Watchers
为了保存数据,我们将使用 Vue Watchers 。
Vue Watchers 与 Computed 属性。计算属性通常用于“计算”和缓存两个或者更多的值。Watchers 比 Couputed 属性更底层,Watchers 允许我们“观察(watch)” 属性的改编。对于一些消耗大的操作时,比如 DB、API 调用等是很有用的。
computed: {
},
watch: {
todos: {
deep: true,
handle(newValue) {
localStorage.setItem(LOCAL_STORAGE_KEY, JSON.stringify(newValue));
}
}
}
|
上面的表达式用于观察数据的改变。deep 意思是递归观察数组和对象的值的改变,如果有变化了,我们就将它们保存到本地存储 localStorage 。
一旦 todos 列表改变了,可以通过浏览器的开发工具看到它们被存储在本地。
扩展
这样,一个基本的 Todo 列表就制作好了。以后的文章里,我们再来讲述组件、路由和本地存储。
获取这里更多