React Setup 让我们将注意力转向客户端并添加 React 。
React 是基于组件的 JavaScript 库,用于构建用户界面。
如果您是一个 React 新手,请了解 tutorial 和 Why did we build React? 。您也可能一步步通过 Intro to React 教程来学习 Babel 和 Webpack 。
确保安装了 Node 和 NPM ,我是通过 NVM 来安装的:
$ node -v
v10.4.1

$ npm -v
6.1.0
项目设置 我们使用强大的 Create React App 来生成所有设置都准备好的样板。
创建模板:
$ cd services

$ npx create-react-app client

$ cd client

$ yarn start
确保 http://localhost:3000 能够访问成功,然后关闭服务。
接下来是简单的部署过程,移除 package-lock.json ,并且在以后的模块安装中不再生成改文件:
$ echo 'package-lock=false' >> .npmrc
更多的配置可以参考NPM文档 。
现在我们来构建第一个组件。
第一个组件 为了简单化,从 src 目录删除 App.css, App.js, App.test.js, index.css,并更新 index.js :
import React from 'react' ;import ReactDOM from 'react-dom' ;const App = () => { return ( <section className ="section" > <div className ="container" > <div className ="columns" > <div className ="column is-one-third" > <br /> <h1 className ="title is-1 is-1" > All Users</h1 > <hr /> <br /> </div > </div > </div > </section > ) }; ReactDOM.render( <App /> document .getElementById('root' ) );
发生了什么?
导入 React , ReactDOM 后,我们创建了功能组件 App,并返回 JSX 。
在 ReactDOM 中使用 render 方法来加载应用到 HTML 元素的根节点 root 。
注意,public/index.html 里面的 <div id="root"></div> 。
添加 Bulma 样式到 public/index.html 的 head 元素内:
<link href ="//cdnjs.cloudflare.com/ajax/libs/bulma/0.7.1/css/bulma.min.css" rel ="stylesheet" >
再次启动服务来看看效果:
基类组件 修改 index.js:
import React, { Component } from 'react' ; import ReactDOM from 'react-dom' ;class App extends Component constructor ( super (); } render ( return ( <section className ="section" > <div className ="container" > <div className ="columns" > <div className ="column is-one-third" > <br /> <h1 className ="title is-1" > All Users</h1 > <hr /> <br /> </div > </div > </div > </section > ) } }; ReactDOM.render( <App /> document .getElementById('root' ) );
发生了什么?
我们创建了一个基类组件,当实例被创建的时候自动运行。
运行时,super() 调用 App 扩展组件的构造器。
您可能已经注意到,尽管使用了基类组件,但是浏览器输出的内容和之前是相同的,接下来我们就会看到不同之处了。
AJAX 为了连接客户端和服务端,添加 getUsers() 方法到 App 类,使用 Axios 来管理 AJAX 调用:
getUsers ( axios.get(`${process.env.REACT_APP_USERS_SERVICE_URL} /users` ) .then((res ) => { console .log(res); }) .catch((err ) => { console .log(err); }); }
安装 Axios :
添加导入:
import axios from 'axios';
import React, { Component } from 'react' ;import ReactDOM from 'react-dom' ;import axios from 'axios' ; class App extends Component constructor ( super (); } getUsers ( axios.get(`${process.env.REACT_APP_USERS_SERVICE_URL} /users` ) .then((res ) => { console .log(res); }) .catch((err ) => { console .log(err); }); } render ( return ( <section className ="section" > <div className ="container" > <div className ="columns" > <div className ="column is-one-third" > <br /> <h1 className ="title is-1" > All Users</h1 > <hr /> <br /> </div > </div > </div > </section > ) } }; ReactDOM.render( <App /> document .getElementById('root' ) );
为了连接 users 服务,打开另一个终端窗口,回到项目的根目录,并更新容器和测试:
$ docker-compose -f docker-compose-dev.yml up -d

$ docker-compose -f docker-compose-dev.yml run users python manage.py test
现在,回到 React ,我们需要添加环境变量 process.env.REACT_APP_USERS_SERVICE_URL 。终止当前的 React 应用,并执行:
$ export REACT_APP_USERS_SERVICE_URL=http://localhost
所有自定义的环境变量必须以 REACT_APP_ 开头。更多的请参考文档 。
我们需要调用 getUsers() 方法,放置到构造函数 constructor 中:
constructor ( super (); this .getUsers(); }
在浏览器的日志中可以看到如下错误的输出:
Failed to load http://localhost/users:
No 'Access-Control-Allow-Origin' header is present on the requested resource.
Origin 'http://localhost:3000' is therefore not allowed access.
简而言之,我们需要跨域(cross-origin )的 AJAX 请求(从 http://127.0.0.1:3000 到 http://localhost),这违背了浏览器的“同源策略(same origin policy)”。幸运的是,我们使用 Flask-CORS 来处理它。
回到项目根目录:
pip install flask-cors

pip freeze > services/users/requirements.txt
为了保持简单,让我们的所有路由在任何域都允许跨域请求。services/users/project/__init__.py:
from flask_cors import CORSdef create_app (script_info=None ): app = Flask(__name__) CORS(app) app_settings = os.getenv('APP_SETTINGS' ) app.config.from_object(app_settings) db.init_app(app) toolbar.init_app(app) from project.api.users import users_blueprint app.register_blueprint(users_blueprint) @app.shell_context_processor def ctx (): return {'app' : app, 'db' : db} return app
更新容器并生产种子数据:
$ docker-compose -f docker-compose-dev.yml up -d --build

$ docker-compose -f docker-compose-dev.yml run users python manage.py recreate_db

$ docker-compose -f docker-compose-dev.yml run users python manage.py seed_db
再次刷新浏览器,应该可以看到正确的日志输出了:
让我们解析 JSON 对象:
getUsers ( axios.get(`${process.env.REACT_APP_USERS_SERVICE_URL} /users` ) .then((res ) => { console .log(res.data.data); }) .catch((err ) => { console .log(err); }) }
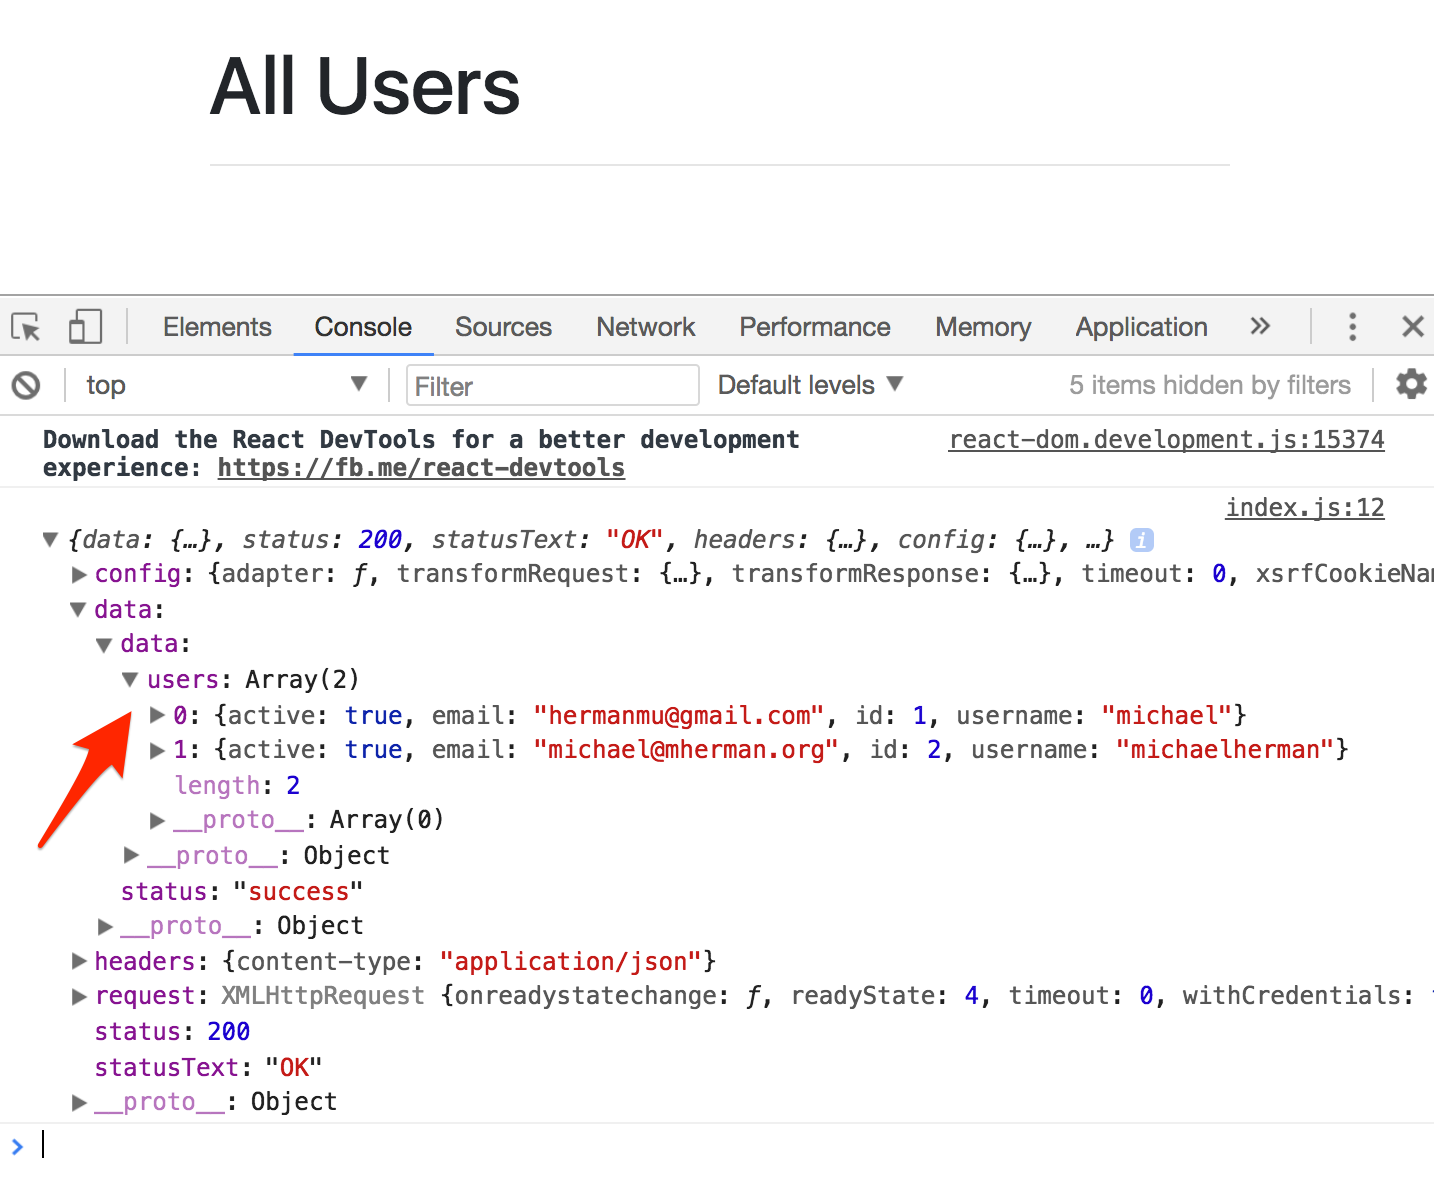
现在可以看到日志输出了包含两个对象的数组:
[
  {
    "active": true,
    "email": "hermanmu@gmail.com",
    "id": 1,
    "username": "michael"
  },
  {
    "active": true,
    "email": "michael@mherman.org",
    "id": 2,
    "username": "michaelherman"
  }
]
在继续之前,我们需要快速重构。记住我们在构造函数 constructor 中调用的 getUsers() 方法:
constructor ( super (); this .getUsers(); };
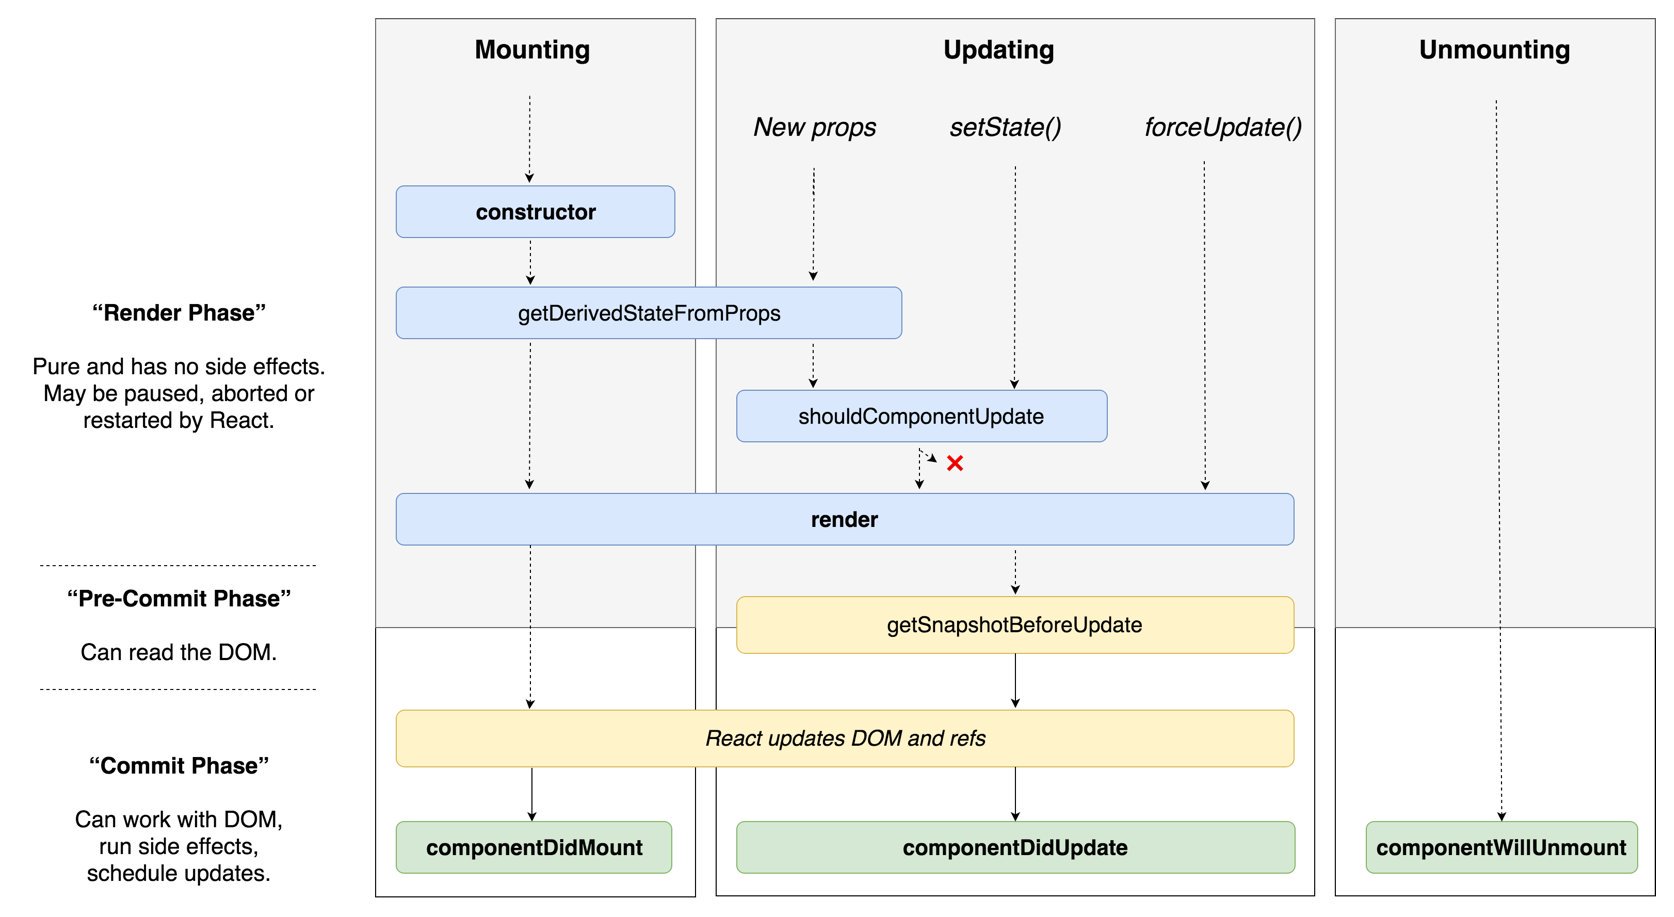
好的,在组件加载到 DOM 之前,constructor 的火力十足。如果 AJAX 请求花费的时间比预期的长,并且请求完成之前组件已经加载了会发生什么?这就要引入竞争条件(race condition ) 。幸运的是,React 的生命周期方法很容易实现。
组件生命周期方法
AJAX 在 componentDidMount() 方法中被调用:
componentDidMount ( this .getUsers(); };
更新组件:
class App extends Component constructor ( super (); }; componentDidMount ( this .getUsers(); }; getUsers ( axios.get(`${process.env.REACT_APP_USERS_SERVICE_URL} /users` ) .then((res ) => { console .log(res.data.data); }) .catch((err ) => { console .log(err); }) } render ( return ( <section className ="section" > <div className ="container" > <div className ="columns" > <div className ="column is-one-third" > <br /> <h1 className ="title is-1" > All Users</h1 > <hr /> <br /> </div > </div > </div > </section > ) } };
确保应用仍然像之前一样工作。
状态 添加状态(state ,例如用户(users),组件需要使用 setState(), 这是一个更新状态的异步函数。
更新 getUsers():
getUsers ( axios.get(`${process.env.REACT_APP_USERS_SERVICE_URL} /users` ) .then((res ) => { this .setState({ users : res.data.data.users }); }) .catch((err ) => { console .log(err); }); };
添加状态到构造器 constructor:
constructor ( super (); this .state = { users : [] }; };
因此,this.state 添加状态 property 到类并将 users 放置到一个空数组。
详细可以查看 Using State Correctly 。
最后,更新 render() 方法来展示数据:
render ( return ( <section className ="section" > <div className ="container" > <div className ="columns" > <div className ="column is-one-third" > <br /> <h1 className ="title is-1" > All Users</h1 > <hr /> <br /> {/* new */} { this.state.users.map((user) => { return ( <h4 key ={user.id} className ="box title is-4" > { user.username } </h4 > ) }) } </div > </div > </div > </section > ) }
发生了什么?
迭代来自 AJAX 请求的用户,并创建了 h4 元素。这就是为什么我们需要设置空数组的初始化状态——防止 map 异常。
key 用于 React 跟踪每一个元素,参考文档 。
功能组件 我们为用户列表创建一个功能组件。
services/client/src/components/UsersList.jsx:
import React from 'react' ;const UsersList = (props ) => { return ( <div > { props.users.map((user) => { return ( <h4 key ={user.id} className ="box title is-4" > { user.username } </h4 > ) }) } </div > ) }; export default UsersList;
为什么我们使用更能组件而不是基类组件呢?
注意我们在组件中是如何使用 props 取代 state 的。本质上,我们可以通过 props 或者 state 到达组件:
props —— 数据流下至 props (从 state 到 props),只读。state —— 数据绑定到组件,读取和写入。
更多的请查看 ReactJS: Props vs. State
限制基于类的(有状态的)组件的数量是一种很好的做法,因为它们可以操纵状态,因此不太可预测。如果您只需要渲染数据(如上例所示),则使用功能(无状态)组件。
现在我们需要将状态从父组件传递给子组件 props 。首先,将导入添加到 index.js :
import UsersList from './components/UsersList' ;
render ( return ( <section className ="section" > <div className ="container" > <div className ="columns" > <div className ="column is-one-third" > <br /> <h1 className ="title is-1" > All Users</h1 > <hr /> <br /> <UsersList users ={this.state.users}/ > </div > </div > </div > </section > ) }
查看每个组件中的代码,并根据需要添加注释。提交你的代码。